How a Factory Manufactures Solar Garden Statue Lights
Solar garden statue lights are not made in the same way as ordinary outdoor decorative lights. They combine figurine-style resin production, hand finishing, and solar lighting integration in one product. That means the factory has to control not only shape and surface appearance, but also wiring paths, waterproof joints, balance, and long-term outdoor durability.
For buyers evaluating decorative figurine products, the manufacturing process matters because statue lights usually involve more complex molds, more manual finishing, and more difficult solar module integration than standard resin housings. This article explains how a factory manufactures solar garden statue lights, from mold development to final inspection, and why these products require a more coordinated process than many buyers expect.
If you are exploring finished product directions, you can also review our Resin Statue Solar Lights collection.
What Makes Solar Garden Statue Lights Different?
Compared with ordinary resin decorative lights, statue lights usually have more demanding production requirements:
- more complex shapes and sculptural detail
- deeper texture and more visible surface finishing
- harder mold parting and demolding conditions
- tighter space for solar panel, battery, LED, and wiring
- higher risk of defects on facial, floral, animal, or relief details
- greater need for hand repair, painting, and balance control
This is why statue lights should not be treated as just another resin shell. In production, they behave more like a hybrid product: part sculpture, part outdoor solar lighting unit.
Process Overview
A typical factory workflow for solar garden statue lights looks like this:
- Product definition and structure review
- Mold development
- Resin preparation and pouring
- Curing and demolding
- Trimming, sanding, and repair
- Surface preparation and priming
- Painting and finishing
- Solar module installation and sealing
- Quality control and functional testing
- Packing and shipment preparation
The core difference lies in how well the factory coordinates detail reproduction, surface quality, and solar integration at the same time.
1. Product Definition and Structure Review
Before mold production begins, the factory normally defines the statue light in practical engineering terms rather than only by appearance.
Important review points include:
- overall size and weight
- statue pose and center of gravity
- where the solar panel will sit
- where the battery and LED cavity will be hidden
- whether the light source should create a direct glow, a soft accent, or illuminate a lantern-style detail
- how the product will stand securely outdoors
- where waterproof joints and service access points will be placed
For statue lights, this stage is especially important because the sculpture shape and the solar structure must work together. A design may look attractive in concept art but still become difficult to mold, assemble, or seal if these points are not reviewed early.
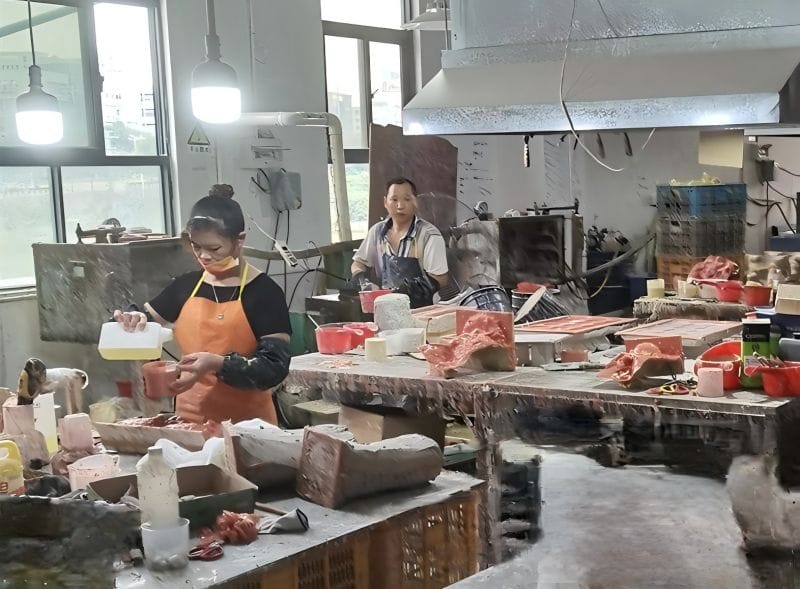
2. Mold Development for Statue Lights
Mold creation is one of the most important steps in statue light production. For figurines, animals, angels, flowers, and textured garden characters, the mold has to capture much more detail than a simple resin shell.
Common mold options include:
- Silicone molds for high-detail decorative forms
- Fiberglass support molds for structural support and repeated casting
- Multi-part molds for shapes with deep relief, undercuts, or protruding details
Why statue molds are more demanding
Compared with flat or simple resin parts, statue molds must handle:
- facial details and expression lines
- feather, fur, bark, stone, or petal texture
- folded wings, limbs, or ornamental extensions
- hidden cavities for lighting modules
- controlled parting lines so visible seams stay minimal
In many projects, mold planning also needs to consider where the LED and wiring path will go, and how much space the base structure needs for solar components.
For a broader view of resin-based production, you can also review our Resin Lights Production Process.
3. Resin Preparation and Pouring
Once the mold is ready, the next stage is resin preparation.
For solar garden statue lights, the resin system has to balance several goals:
- good detail capture
- stable curing
- enough strength for outdoor use
- compatibility with sanding, filling, and painting
- suitable weight for the product size and structure
A typical resin mix may include:
- base resin
- hardener / catalyst
- fillers for strength or body
- pigments or colorants where needed
Why pouring control matters more for statues
Statue lights often contain small details, hollow spaces, or uneven thickness. That makes the pouring process more sensitive than it is for simple resin parts.
Common risks include:
- trapped air bubbles in facial or decorative details
- incomplete filling in thin edges or raised patterns
- uneven density in larger figurines
- weak zones around internal cavities
To reduce these risks, factories usually control:
- mixing ratio
- temperature and humidity
- pouring speed
- venting path
- mold orientation
In practice, detailed figurine products often need more careful pour planning than ordinary resin decorative housings.
4. Curing and Demolding
After pouring, the resin must cure fully before demolding.
During this stage, the factory watches for:
- incomplete curing
- distortion
- shrink-related defects
- weak edges
- damage during demolding
Statue lights are more sensitive here because they often have:
- extended shapes
- thin decorative elements
- fragile surface details
- deep textures that can catch during release
A professional factory treats demolding as a controlled step, not simply a mechanical release. Poor demolding can easily damage the detail quality that buyers actually care about most.
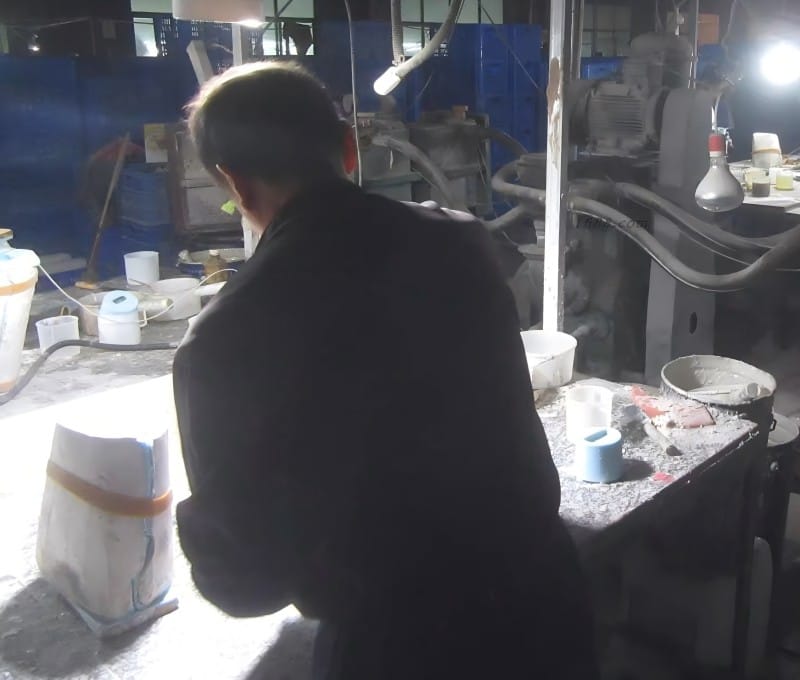
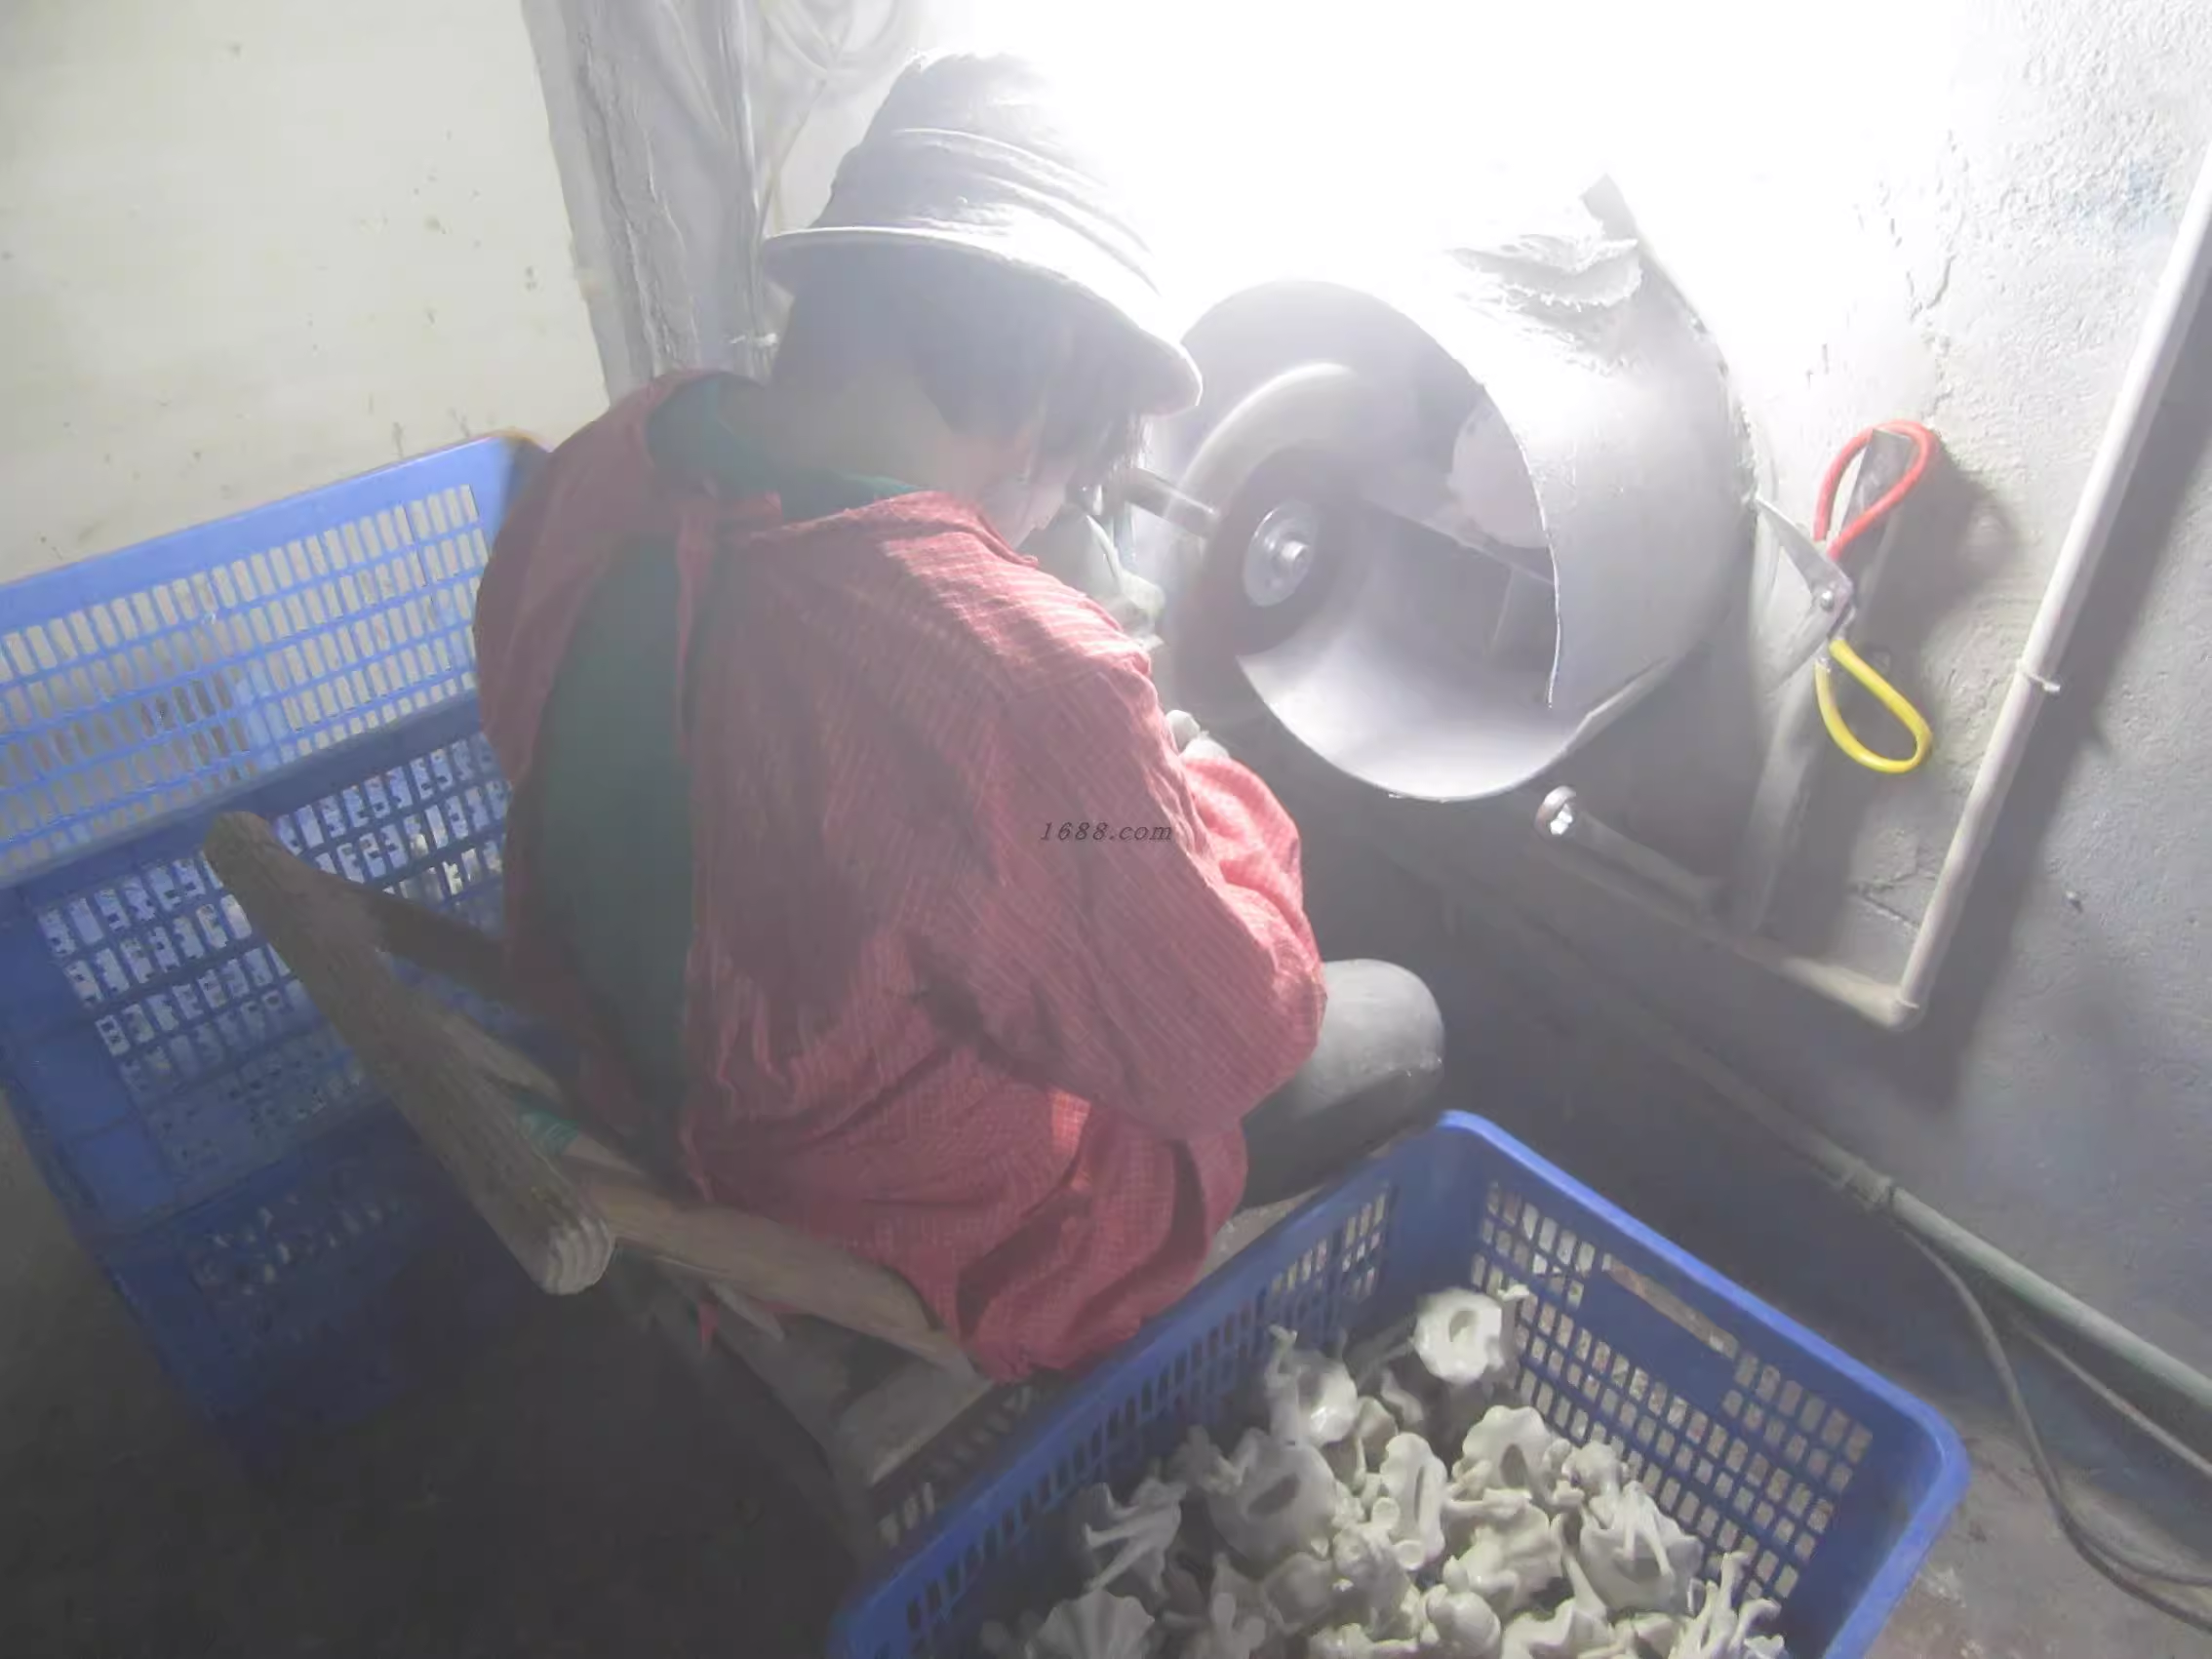
5. Trimming, Sanding, and Repair
This is one of the most important stages for statue lights.
After demolding, factories usually remove:
- excess flashing
- visible seam lines
- small surface burrs
- edge irregularities
Then comes sanding and repair.
Why sanding is more delicate for statues
On statue products, aggressive sanding can quickly destroy sculptural character. Facial features, feathers, fur texture, floral veins, stone carving effects, and other raised details can all be softened or lost if surface correction is too rough.
Common repair points include:
- pinholes
- small air bubbles
- seam marks
- chipped decorative edges
- local surface sinks
A good repair process does not simply cover defects. It restores the surface in a way that keeps the texture and form consistent with the surrounding sculpture.
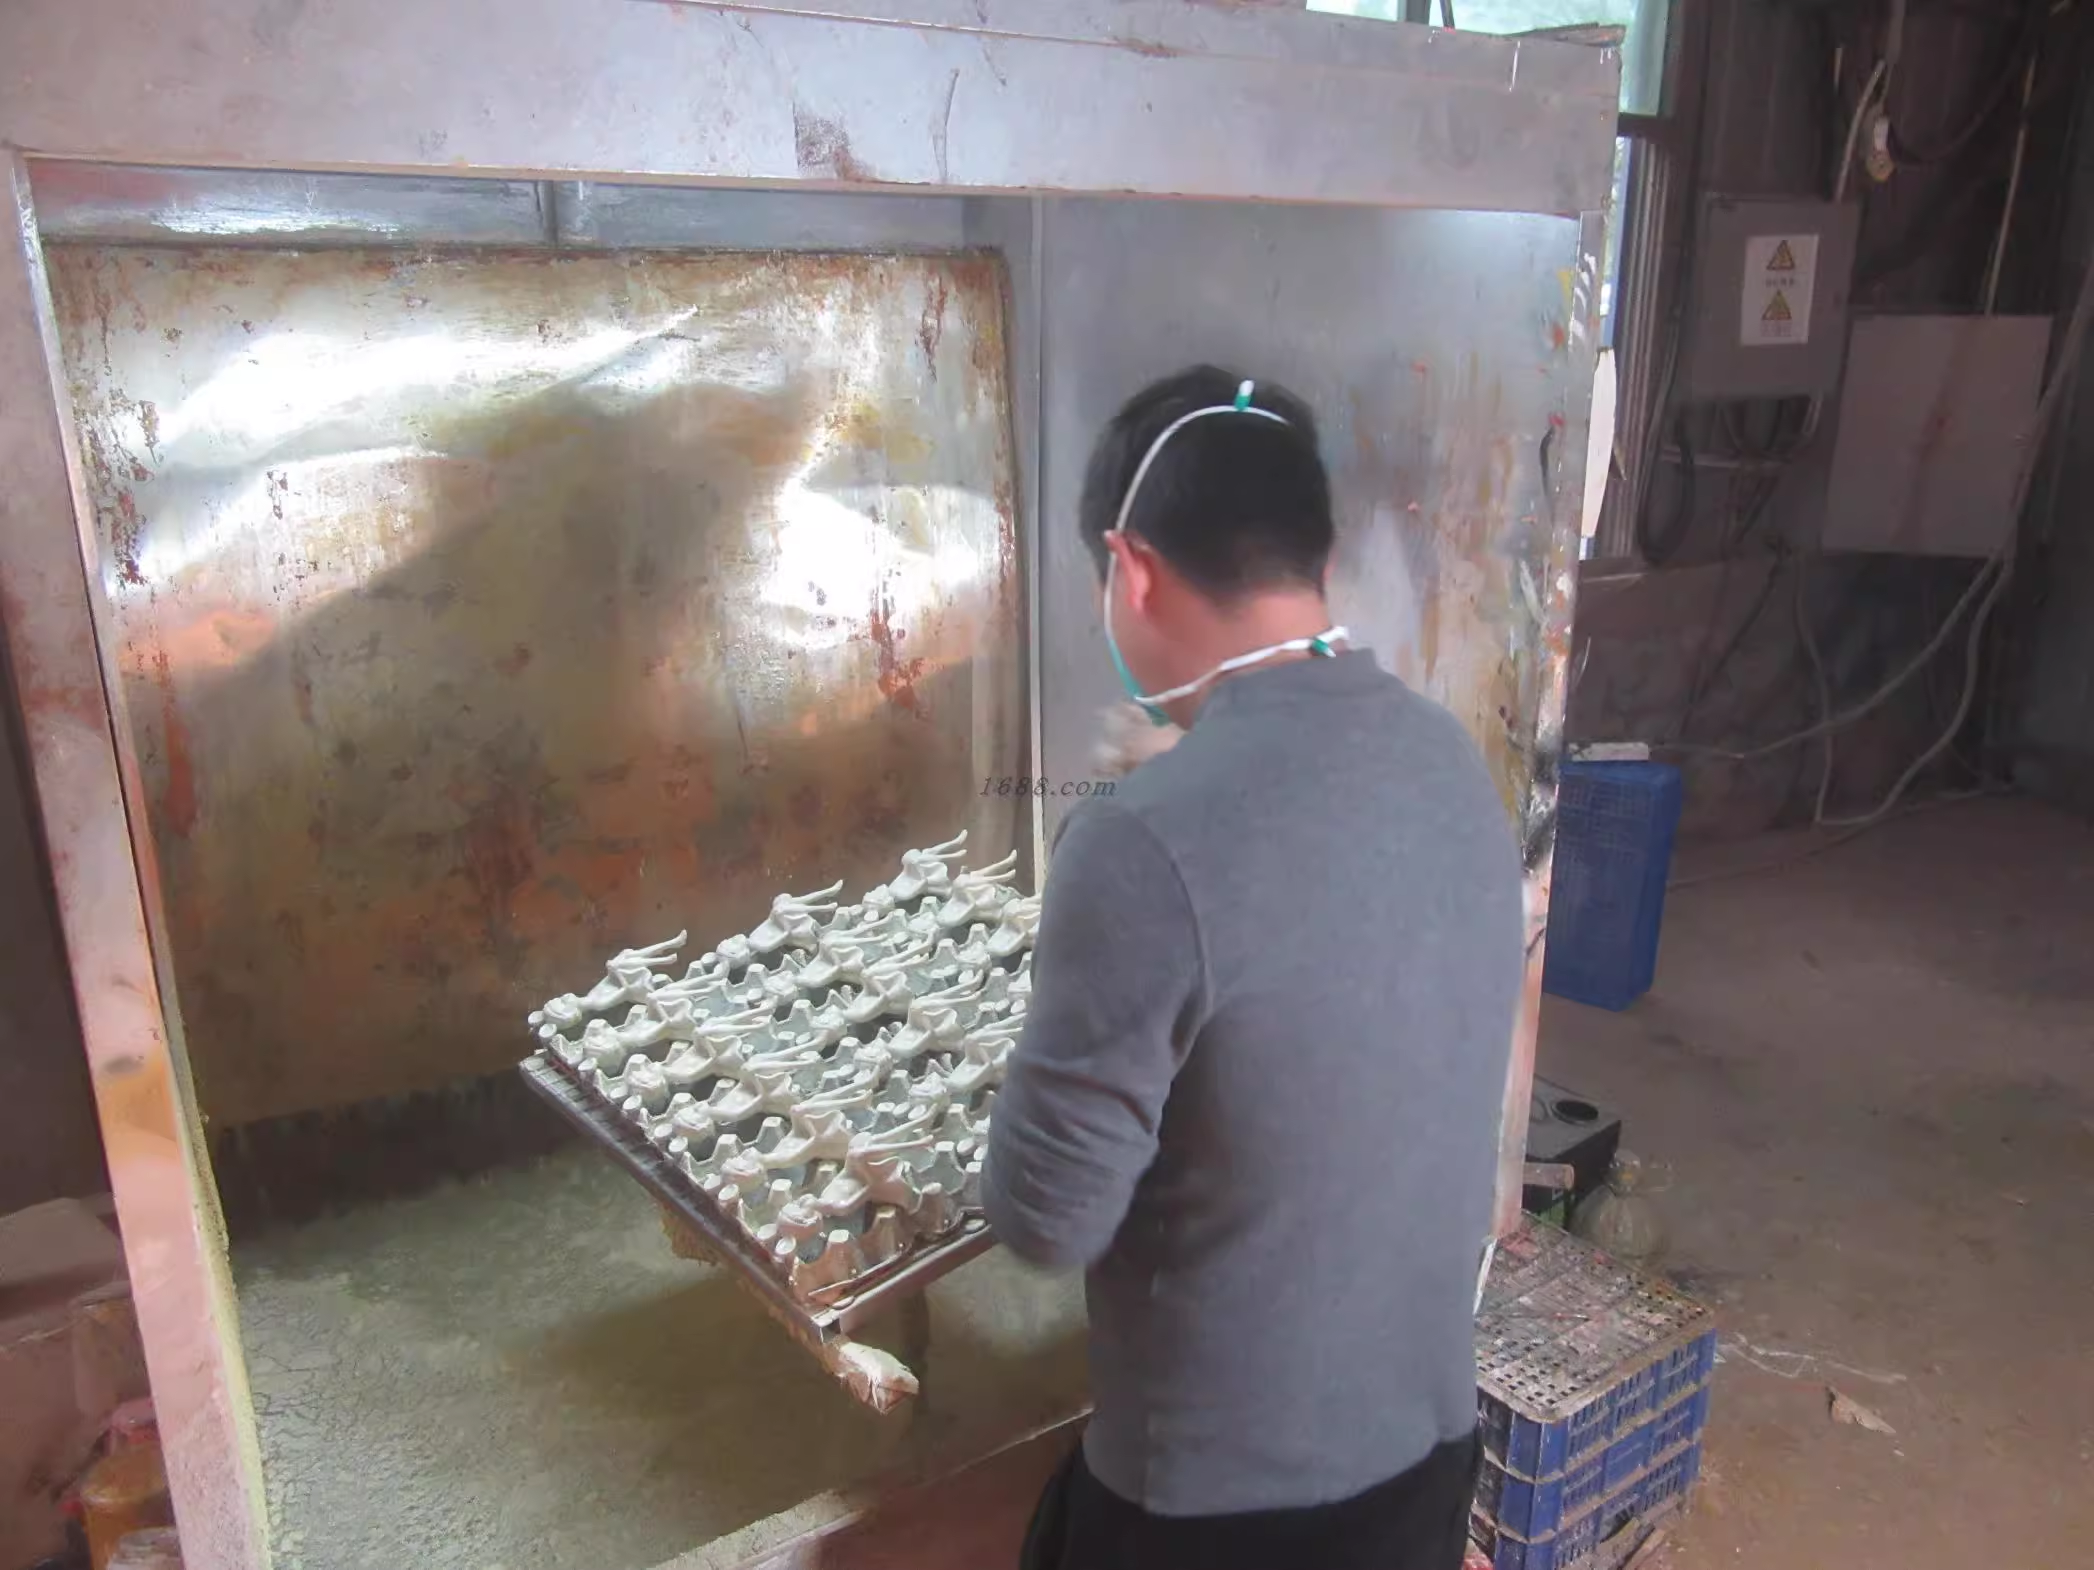
6. Surface Preparation and Priming
Before painting, the factory prepares the resin surface carefully.
This usually includes:
- dust removal
- cleaning off release residues
- checking repaired areas
- applying primer suited to resin and outdoor coating systems
For statue lights, priming matters because the surfaces are rarely flat. Textured resin surfaces can absorb coatings unevenly, especially around repaired areas, deep lines, and raised decorative forms.
The goal is to create a stable surface that allows later paint layers to look consistent and bond well.
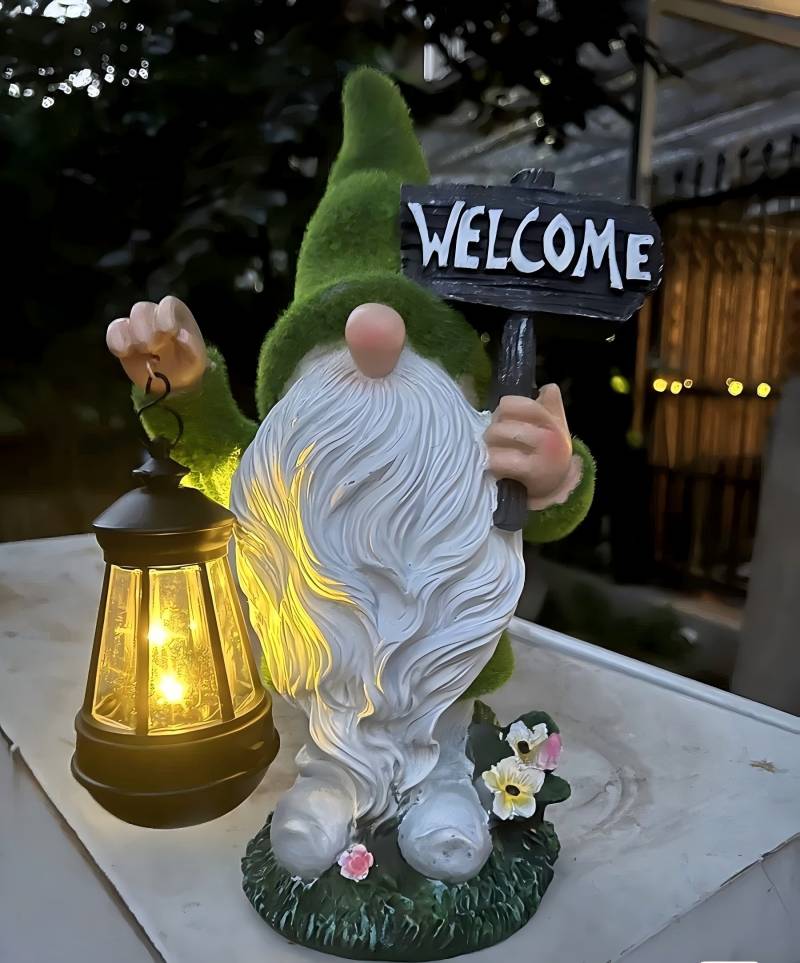
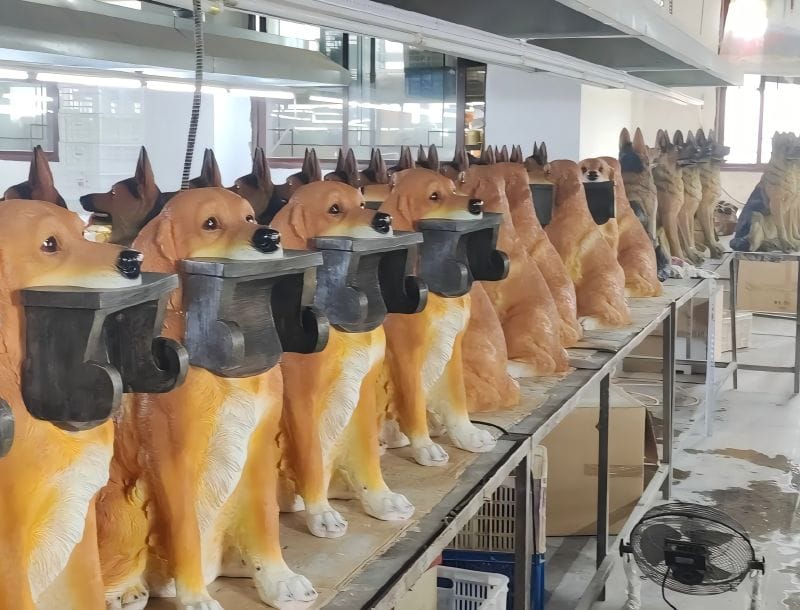
7. Painting and Hand Finishing
Painting is where solar garden statue lights gain much of their product identity.
In statue light production, painting often combines:
- base spraying for broad coverage
- hand painting for facial, floral, animal, or accent details
- layering for stone, bronze, antique, moss, or weathered effects
- protective topcoats for outdoor durability
Why statue painting is different
Unlike simple resin bodies, statue lights usually need the paint system to do more than add colour. It also helps create visual depth and define sculptural detail.
A factory may use painting to emphasize:
- fur or feather texture
- carved stone effects
- aged metal effects
- flower petal gradients
- lantern windows or glowing zones
- contrast between body and illuminated detail
For outdoor products, the coating system also needs to stay compatible with UV exposure, humidity, and handling.
8. Solar Module Integration
This is where statue lights become truly different from ordinary resin figurines.
After the decorative body is finished, the factory integrates:
- solar panel
- battery compartment
- LED light source
- wiring
- control switch or sensor if required
- waterproof joints and seals
Key integration challenges for statue lights
Solar panel placement
The panel must receive enough light without ruining the product appearance. In statue designs, this often means careful placement on the base, top surface, or a less visually sensitive area.
Battery and wiring space
Unlike box-shaped housings, statue bodies often provide limited internal space. Battery cavities and wire routes have to be planned so they stay hidden while remaining serviceable and secure.
LED positioning
The LED cannot be placed randomly. It must align with the intended effect:
- face glow
- lantern glow
- hollow pattern light
- accent illumination on a sculpted feature
Waterproof assembly
The joint between resin body and solar module often becomes the highest sealing-risk area. This connection must be designed and assembled carefully to protect internal electronics in outdoor use.
This coordination between decorative production and final assembly is part of the wider Manufacturing logic behind complete outdoor lighting products.

9. Quality Control for Solar Garden Statue Lights
Statue lights need more than a basic visual check. A proper QC process should cover both decorative quality and solar function.
Visual and surface checks
Factories should inspect for:
- visible mold seam lines
- pinholes and surface bubbles
- loss of sculptural detail
- uneven paint coverage
- inconsistent colour between pieces
- poor repair blending
Structural checks
Factories should also confirm:
- base stability
- standing balance
- integrity of protruding parts
- fit of access covers or module joints
Functional checks
Solar statue lights should be tested for:
- LED function
- battery fit and charging behavior
- switch response if applicable
- panel alignment
- light effect consistency
- sealing performance around module joints
Why QC matters here
For figurine products, even small defects are easier for end customers to notice. A slight seam on a smooth housing may be acceptable, but on a face, animal figure, or decorative statue it can sharply reduce perceived value.
For a broader view of how we manage inspection and production consistency, you can also see Our Quality.
10. Packaging and Shipment Preparation
Because statue lights often include both fragile sculptural shapes and electronic components, packaging must protect both appearance and function.
Typical precautions include:
- isolating protruding parts with shaped inserts
- preventing paint abrasion during transport
- protecting solar panels from scratching
- keeping battery and switch areas stable in the carton
- verifying orientation marks for export packing
For complex figurines, packaging is not just a logistics step. It is part of the manufacturing result, because poor packing can damage the most valuable visual details before the product reaches the customer.
11. Why This Process Matters for OEM and Product Development
For buyers developing a custom solar statue light, the biggest risks usually appear long before mass production.
They appear when:
- the design is too complex for stable molding
- the panel placement is decided too late
- the internal cavity is too small
- the seam line falls in a highly visible place
- painting expectations are not matched to production method
- the product is approved visually but not engineered for outdoor use
That is why solar statue light development works best when sculpture, mold planning, painting logic, and solar module integration are discussed together from the start.
If you are evaluating a custom project, our OEM Solutions page explains how development, tooling, and production planning can be aligned earlier.
Conclusion
Manufacturing solar garden statue lights is more demanding than manufacturing many ordinary decorative outdoor lights. The process combines:
- detailed mold development
- controlled resin casting
- careful sanding and repair
- layered surface finishing
- precise solar module integration
- product-specific quality control
What makes these products difficult is not any one step by itself. It is the need to coordinate sculpture detail, outdoor durability, and solar functionality in one finished product.
For Glowyard, statue lights are not treated as simple resin ornaments with a light added later. They are developed as complete outdoor products, where mold accuracy, hand finishing, electrical integration, and production consistency all need to work together.
For buyers, understanding this process makes it easier to evaluate suppliers, define realistic specifications, and build better decorative lighting product lines.

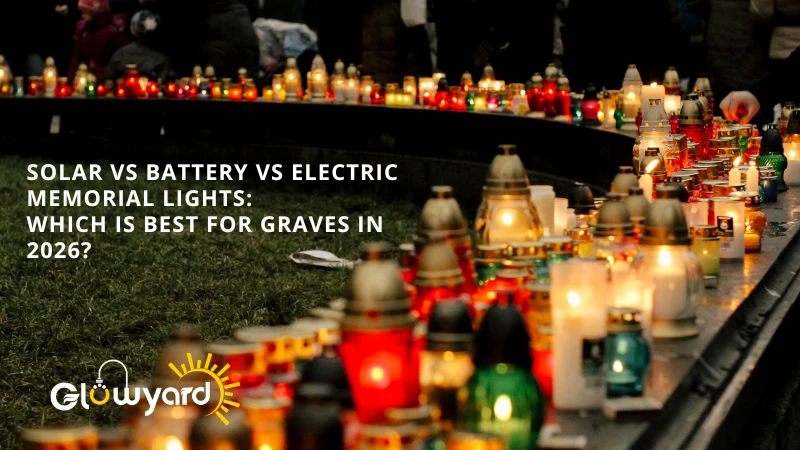
![do solar lights work in winter at cemeteries [2026 guide]](https://glowyard.com/wp-content/uploads/2026/03/Do-Solar-Lights-Work-in-Winter-at-Cemeteries-2026-Guide.webp)